The Whole Nine Yards.
As promised I have accumulated all of the images related to our kitchen transformation and I will try to take you through our process, but first I think you have to understand what other stages it went through during our time here.

When we bought the house in 2013 this room was down a dark corridor and contained two beds and a little old sink behind a curtain. It was cold, dark and damp and we thought… this would make a great guest room!

We dug out the floor, and put down a new concrete surface. Some of the wooden beams found in the floor have been used elsewhere in the house, in fact one of them is above the new door to the kitchen.

We then replaced render on the walls, tiled the floor, painted, put in furniture and bobs your uncle…
Four years later …. fed up of living in a cramped ‘make-do’ kitchen which attracted flies in summer and froze you to the bone in winter, we decided that, as practically nobody came to visit us, our priorities needed to change. Our space had to come first.

I explained to Dan that the room we had recently renovated needed to be turned upside down, walls needed to come down and we were going to build the new kitchen from scratch, out of the hardest wood imaginable, with not one straight edge to be seen. I felt the air being sucked out of the room as he took a deep breath and refrained from beating me to death with a lump of the aforementioned wood.

Despite this, he duly played along, but I had to kick it off to make sure we were past the point of no return. So I ripped out the ceiling, removed the render and spent most of the first few months covered in dust, eating dust and stabbing myself in the eye with bits of broken wood…. Point of no return achieved!

The biggest and scariest part of this transformation was taking out the wall between the old bedroom and the corridor. The beams above had to be held with agro props while we dismantled it piece by piece…until we met the door lintel – you’ve probably seen the video, but if not click here. It was pretty hairy but we got it out and between the two of us managed to put up a massive beam in its place and a column for support.

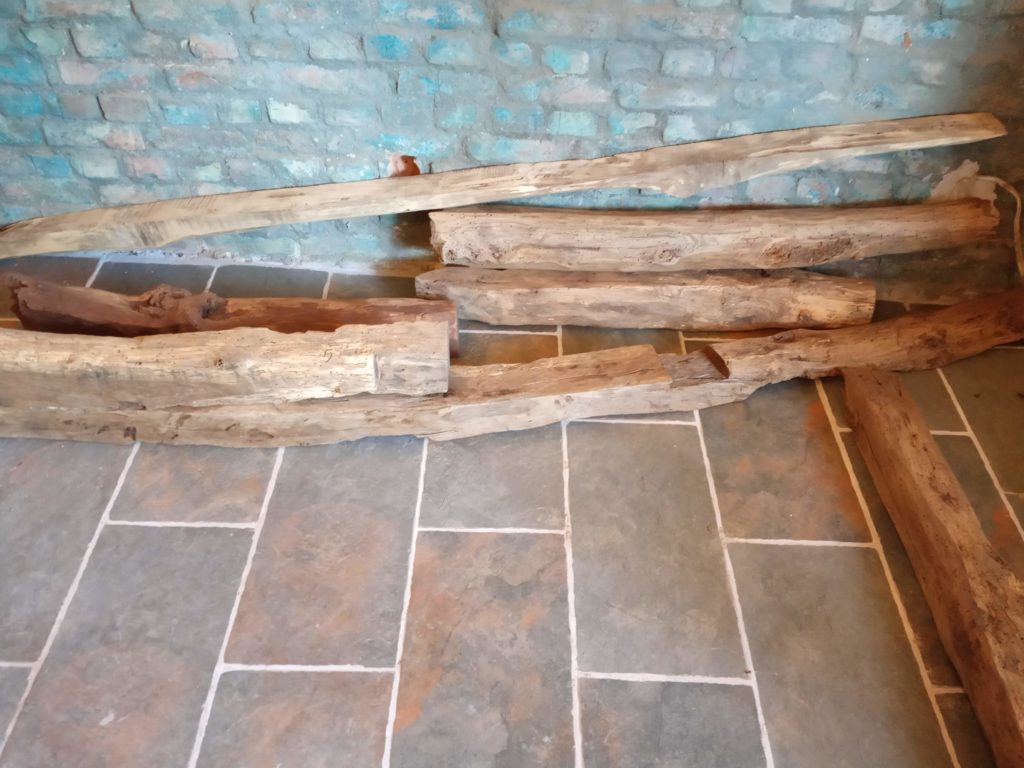
Both of these large pieces of wood weighed a ton and came out of the old barn that we took down. They are now very much a focal point of the room.
This is when the real work started!
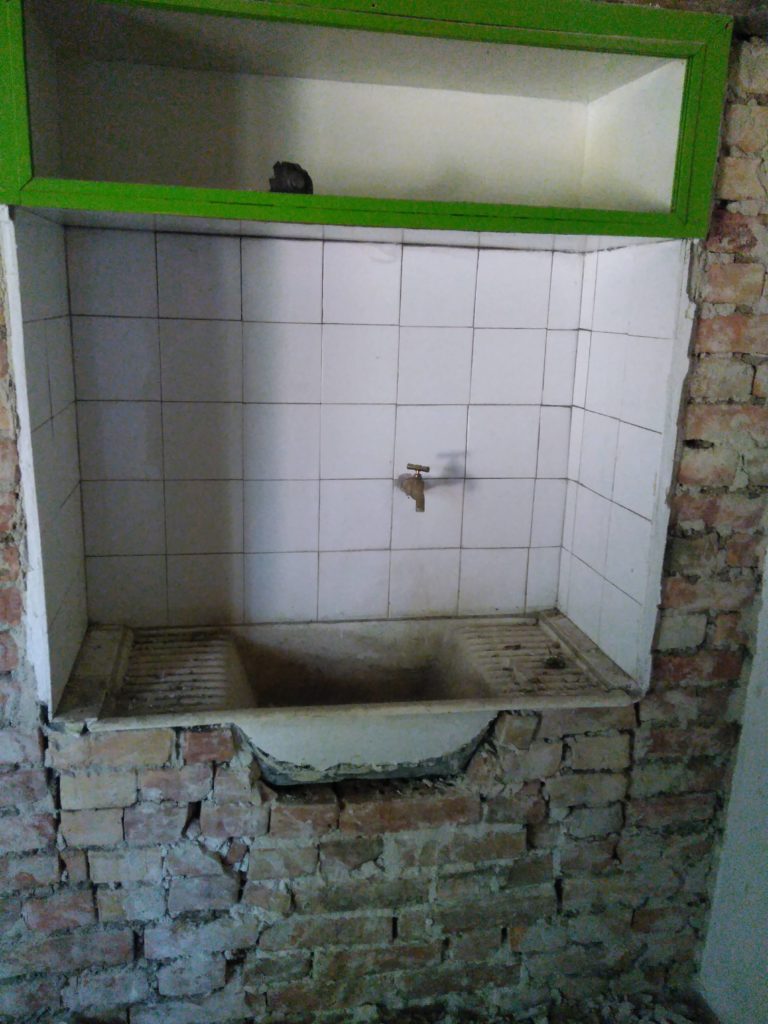
The first job was to confirm the new water source. One of the things we had struggled with since moving here was that every winter the water would freeze up at the point it entered the house. Mainly this was due to it coming into the building on the North side, and in a roughly built add-on, not providing much protection from the elements. We hoped that behind this old sink contraption there would be a separate source we could tap into.

So we demolished it and crossed all fingers and toes. The solution, if we didn’t discover what we hoped would be an independent source, would be to dig up the kitchen floor (that I’d just laid) and reroute the current one. Not something I really wanted to do.
We were lucky! Tap into this and we would have a source that came into the center of the house – no more freezing in winter… YAY.

So as we were already in demolition mode, we thought this was a good time to stop walking down the now defunct corridor and to put in a new door way. This was probably the easiest thing we did in this build as there had obviously been a door here before, in days gone by, but it would be months and months and months before we would actually have a door across this hole.

It was naturally Dan’s job to brick up the old entrance.
There’s a pattern forming here – I demolish, Dan rebuilds ha ha.

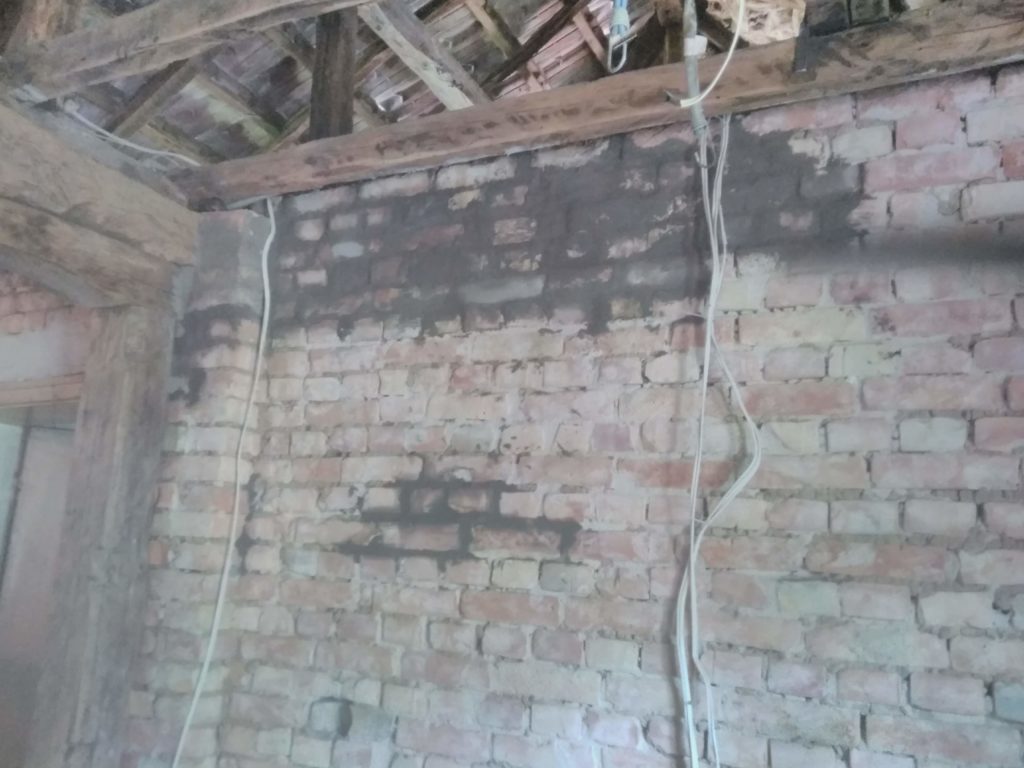
To start putting all this back together again in the form of a kitchen, first we needed to make more mess and more dust. We stripped off all the old render from the walls and chipped off the old/new tiles from the floor…they had only been down about 2 years so me being me I tried to save them so this took a little longer than it should have in reality.

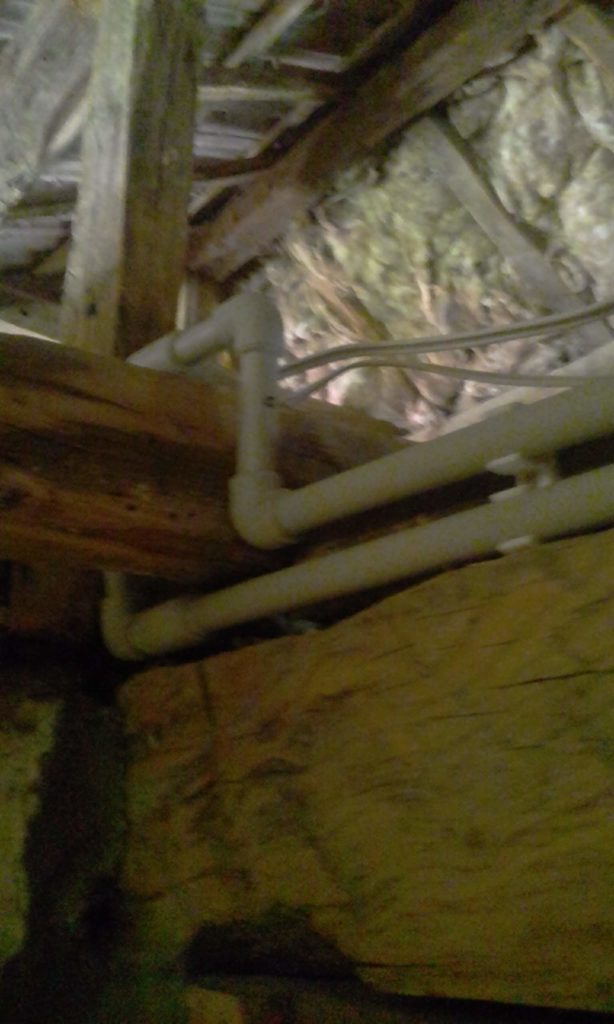
It was now time to start creating the space we wanted. Dan bricked up the gaps between the roof eaves and the external walls. With the open ceiling/roof space this would be a tad drafty and needed doing all the way around, not just above the kitchen. The roof space spans across the entrance hall, the kitchen and the room that will be a spare room in 2020.
This was quite a big job, but we used the bricks out of the wall we had taken out, so it only cost us sand, cement and time.
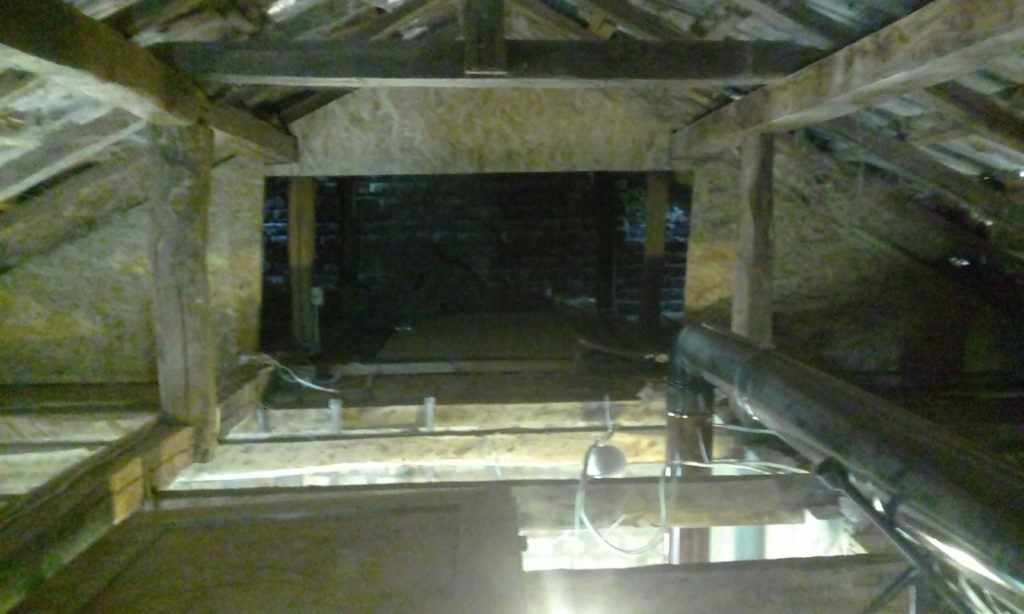
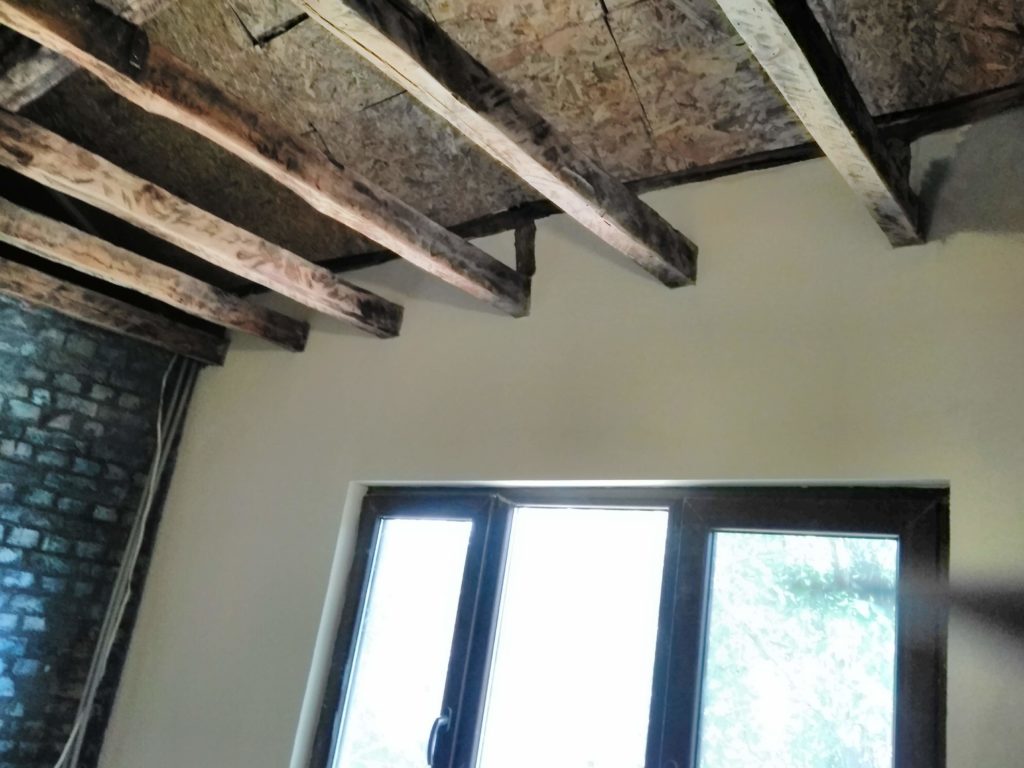
While he was busy up the ladder, I was firmly lodged in the loft, crawling amongst the spiders and wasps, balancing on old doors placed across the beams. It was my job (as Dan doesn’t do spiders) to insulate and board the whole roof space. I don’t think I have ever been so happy to finish a job as this – cramped, high, dirty and a back killer trying to move things around in a restricted space. Dan then helped by placing barriers across the parts of the loft that were not going to be part of the kitchen.
Essentially hiding them … out of sight, out of mind… it worked.

I then set about panelling over the kitchen with tongue & groove boards.
Painting the boards and oiling the visible beams with Danish Oil.
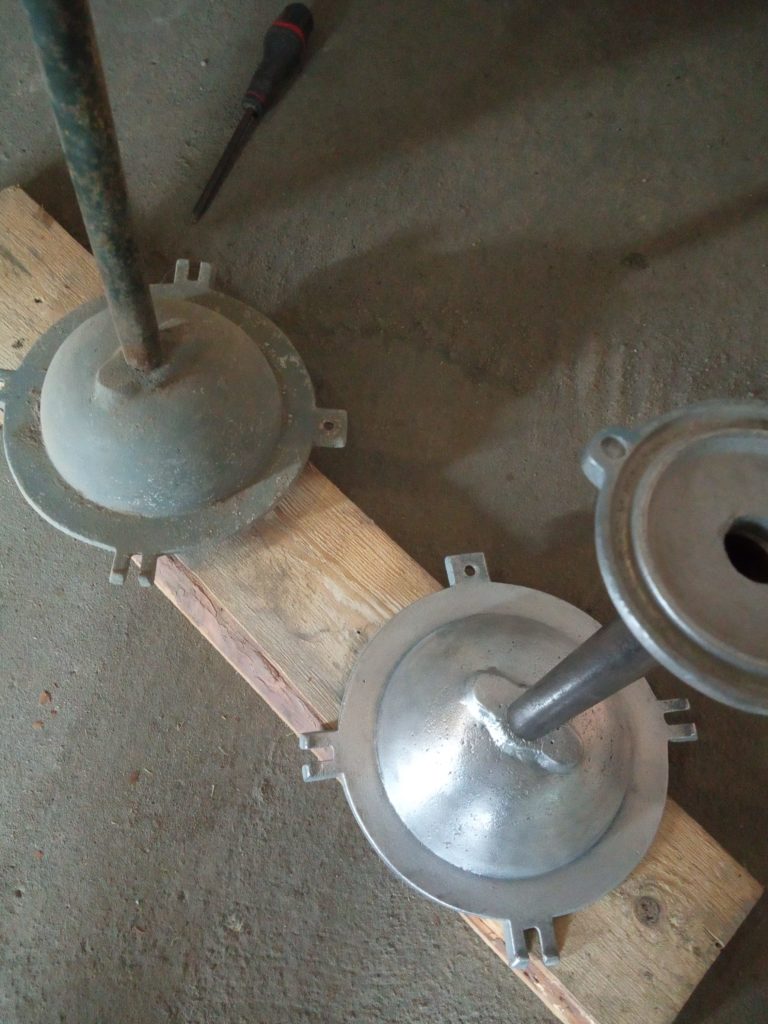
Dan cleaned up three old lights… And installed them in the loft.


We then had the conundrum of how we run the flue to the woodburner through this load of wood without setting fire to the house.
Enter Dan the ingenious car nut…a wheel nut ‘spider’, a little bit of welding and hey presto, the perfect flue support was born.
It keeps the flue away from the beams and unlike using the standard Bulgarian method of hanging them from wire, these do not pull the flue joints apart. Perfect!
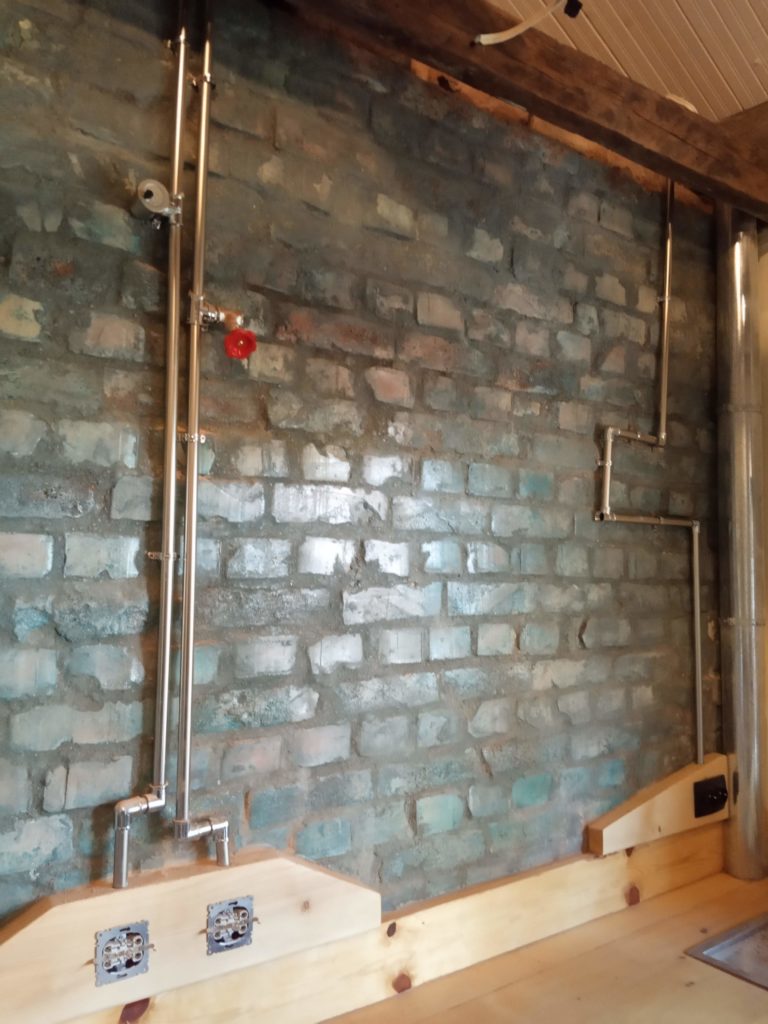
We then split our skill set once more as Dan started to replace rendering on the walls, and I began the task of pointing up the brick work on the two feature walls.


While I’m writing this I’m starting to realise just how much of a team effort this was, but this was the point at which I made the biggest and BEST mistake of the build. I wanted to make sure the pointed bricks were sealed so we didn’t have a constant stream of dust in the kitchen once operational.
I did what any self respecting DIYer does and googled the best product for this. Bearing in mind on rendered walls we usually use a pink product that once mixed with water and painted on it dries clear. But having used this product on several occasions, I was never quite happy with the result so…
After much investigation I found a German product that was stocked here. It was blue, but I made the assumption that similar to the pink product it would dry clear once diluted and painted onto the brick work.
It didn’t – it stayed a bluey, green, almost like oxidised copper and I absolutely love it – it has now been varnished and is definitely staying put.
With this wall completed, I added paint to the rendered walls, Dan concreted the old corridor floor over my central heating pipes and I began the plumbing of hot and cold water and the central heating manifolds in preparation for the new woodburner.


Time for me to start tiling …I fell in love with these tiles and just had to treat myself. They were a little more expensive than I would normally buy, but the quality was much better. Getting the local DIY supermarket to understand that you wanted to order them and not just buy something else they happened to have in stock was amusing. This is as close as I’ll get to my own Pretty Woman moment… I have an obscene amount of money and I want to spend it…obviously minus Julia Robert’s legs.
I then got the call every daughter dreads. My Dad was in hospital after a bad fall and they believed his injuries were unsurvivable. I dropped everything and left Dan alone to manage everything.
Despite Dad’s amazing determination to recover he lost his battle and I had to say goodbye. I took a certain amount of comfort from the fact that he would not have had any kind of life if he had survived as he would have been paralysed from the neck down and dependent on others. Something he would have hated.

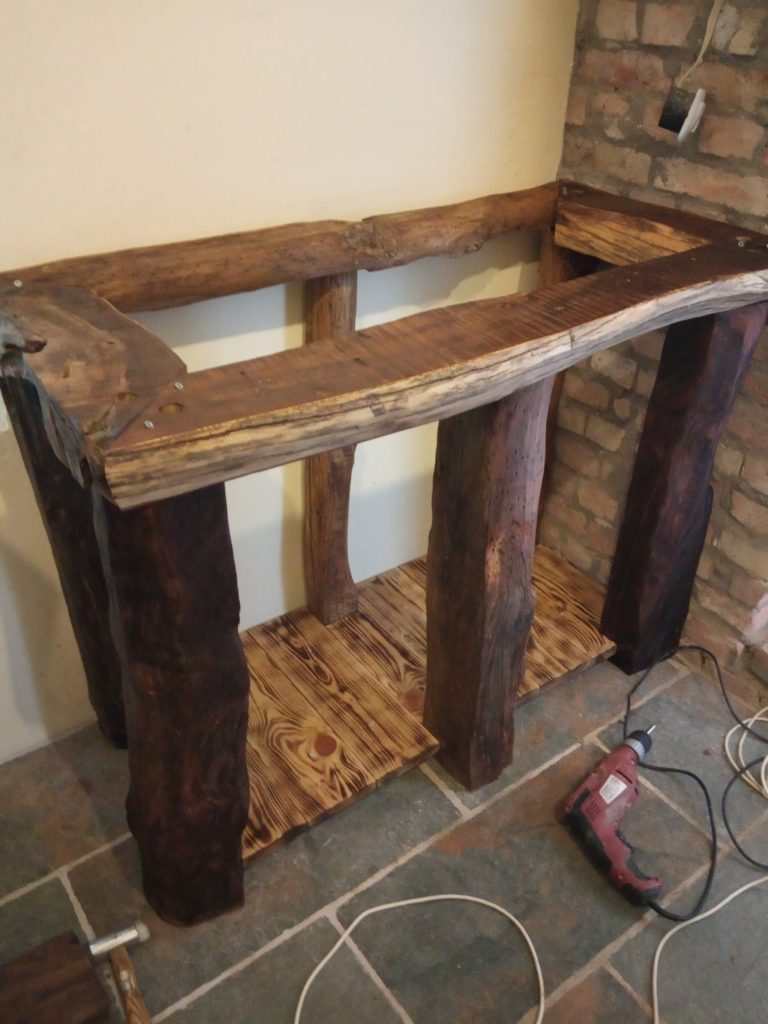
I was away for six weeks and had left dan with a pile of wood. Like a giant jigsaw puzzle or jenga game. I had previously drawn sketches of how I envisaged it looking like, but it was down to him to bring it all together and with no-one to even hold one end of the wood.
I am not sure how he pulled it off without any support but here are a few pics of the progress he made while I was away. You have to bear in mind this wood was rescued from the old barn we took down and is as hard as nails and there is not a straight edge to be seen.
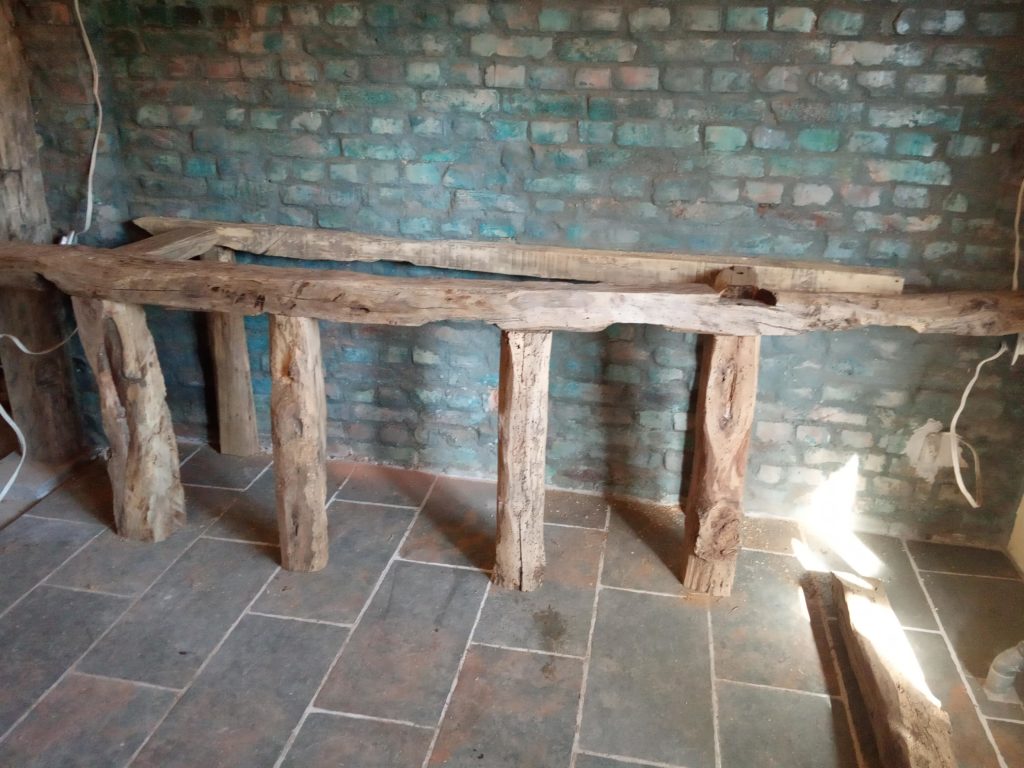


The shelving was created using cheap, rough boards that Dan burnt to give them an aged look. The partitions were made using the same panelling that I used on the ceiling. Most amazingly though the end panels were created with the dirty, scruffy pieces of wood that were in the original ceiling. Turns out they are elm and with a bit of sanding and oil they look amazing.

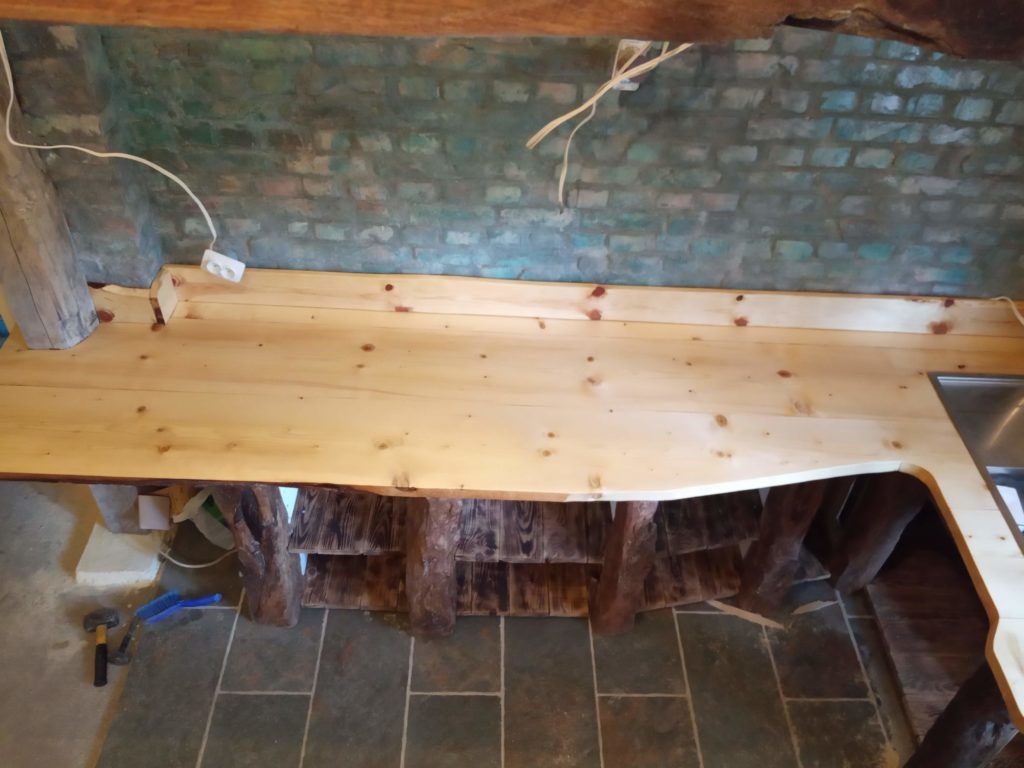
The worktops were rough pine that he sanded, sanded and sanded again and then oiled over and over again, around nine coats.
Coming home to this, made me feel so proud of him – he is not a carpenter, he has never built anything more than a chicken coop with wood and yet he had created this amazing main workspace for us.
It will last a lifetime and I love it.
The work couldn’t stop though. I needed to get back involved to take my mind of recent events and this kitchen was only one of the three things on our to do list for this year … so we cracked on!
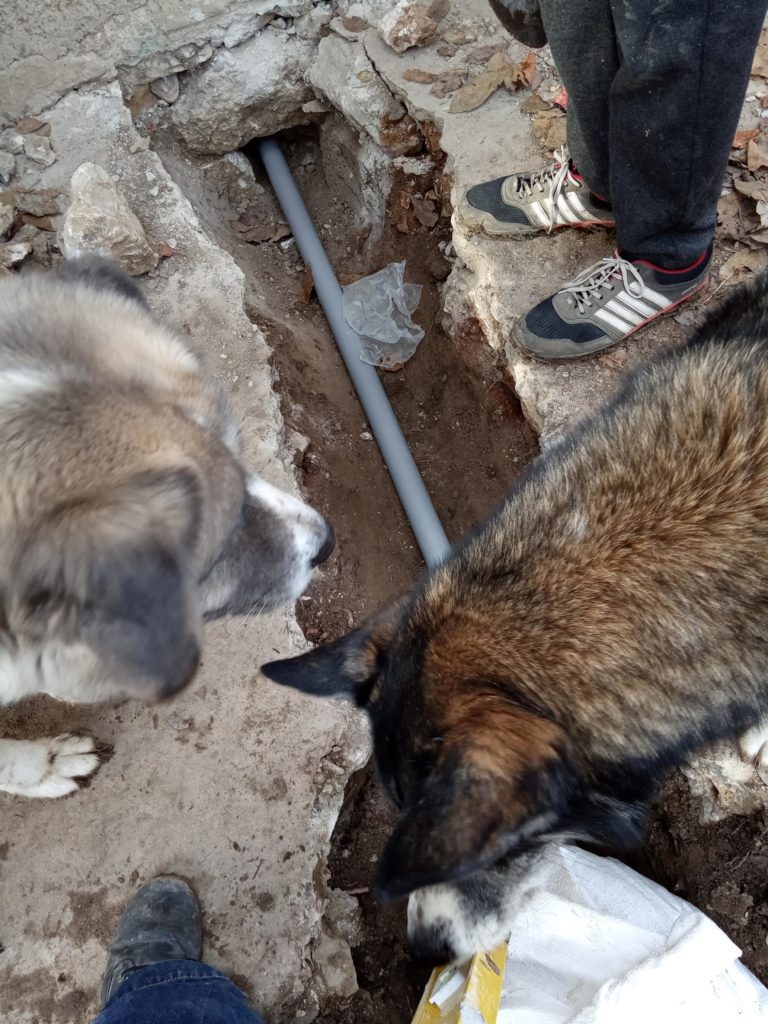
We dug the waste for the kitchen sink outside, giving it plenty of drain area and we were working under close supervision.

Dan then created the final workspace to house the gas hob and the bottle. I love how he matched the curves to the sink unit the other side of the window. He also created some electrical socket holders out of wood so they are in keeping with the units.


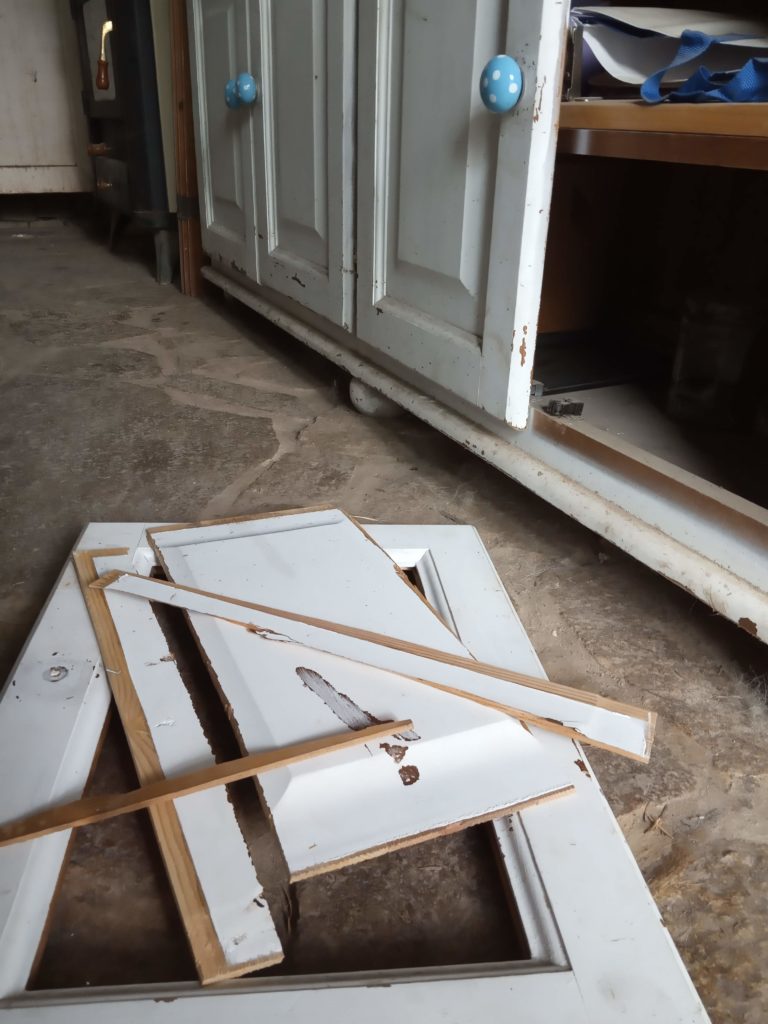
While he was doing this I renovated my dresser that I bought from a dear friend in the UK. On delivery I made a rookie error and it tumbled onto one of the doors – smashing the inner piece. This meant I had to find a solution for all four doors. I put a solid metal grill behind each one and also sanded the doors, shelves and drawer fronts and painted the frame a light grey – it looks amazing too.


With the project nearly finished I ran electrics through pipework on the feature ‘blue’ wall, put in a light bar with a piece of wood rescued from our old animal pens and created the lights out of old touch lamp bases.


There was only one thing left to do – bring in the new woodburner, hook up the central heating and MOVE IN!!

So there you have it. I have really enjoyed putting this together as when you are immersed in a project like this you forget a lot of the things you do along the way.
It sure beats just buying some cheap chipboard units and fixing them to the wall, this kitchen will outlast us and I love every minute I spend in it. Since writing this I have now created a window bench out of an old chest that was left in the house and frequently prefer to sit in here with my music on than in front of the TV.
Dan did an incredible job with the units, but looking around the room you can see that every piece of this room is a part of both of us – a testament to true teamwork, with a little of my project management in there too.

It looks amazing! Such a transformation. You are very inspiring next year I vow to try and build something myself even if it is a tiny box hehe.
You think I’m inspiring…I look at what you’re doing and wish I could do something similar 🙂 We always want what we don’t have ha ha xx
Wow,. Some job with great results. I hope that you don’t decide to change the use of the room again!
Ha ha – thank you Cally – don’t worry I’ll not be changing this room in a hurry – way too much to do in other rooms 🙂